
How to Edit RAW Photos in Lightroom: A Complete Step-by-Step Guide for Beginners
How to Edit RAW Photos in Lightroom: A Step-by-Step Beginner Guide
If you’ve ever shot photos in RAW format and wondered how to make them look vibrant and professional, this guide is for you. Lightroom gives you the power to turn dull, flat RAW images into eye-catching masterpieces — all with a few simple adjustments.
In this post, I’ll walk you through how to edit RAW photos in Lightroom step by step. Whether you’re new to photo editing or just want to improve your workflow, you’ll find everything you need here.
What Exactly Is a RAW Photo?
A RAW photo is the unprocessed, high-quality image your camera captures before any editing or compression. It’s like a digital negative that contains every bit of detail, tone, and color data.
RAW files often look flat straight out of the camera, but that’s what makes them special — they hold enormous potential for editing.
Why photographers love shooting in RAW:
* You can recover lost details in shadows and highlights.
* Colors stay accurate and flexible for correction.
* You can adjust exposure without losing quality.
* Ideal for professional editing and printing.
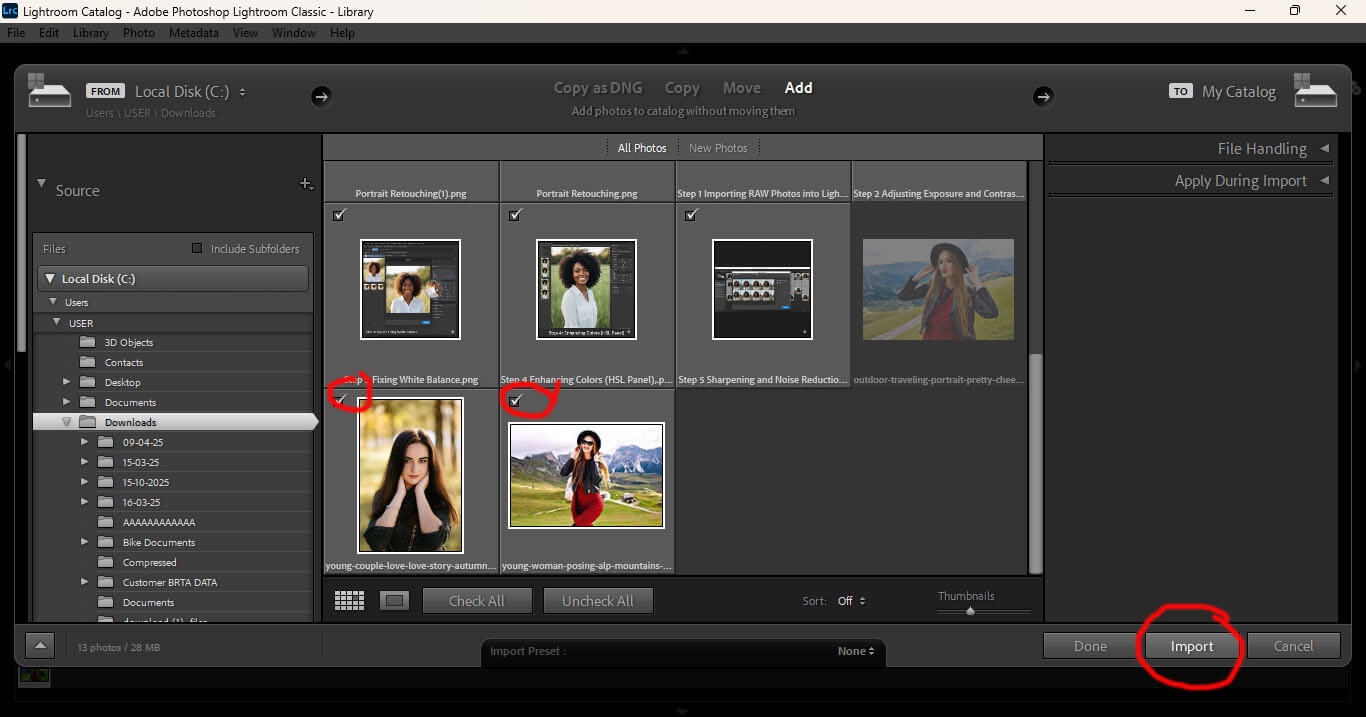
Step 1: Import Your RAW Files Into Lightroom
Open Adobe Lightroom and click the Import button. Find your RAW files from your memory card or folder, select them, and import them into your catalog.
Pro Tip: Create a new folder for every photo shoot and rename your files properly — it makes editing and organizing much easier later.
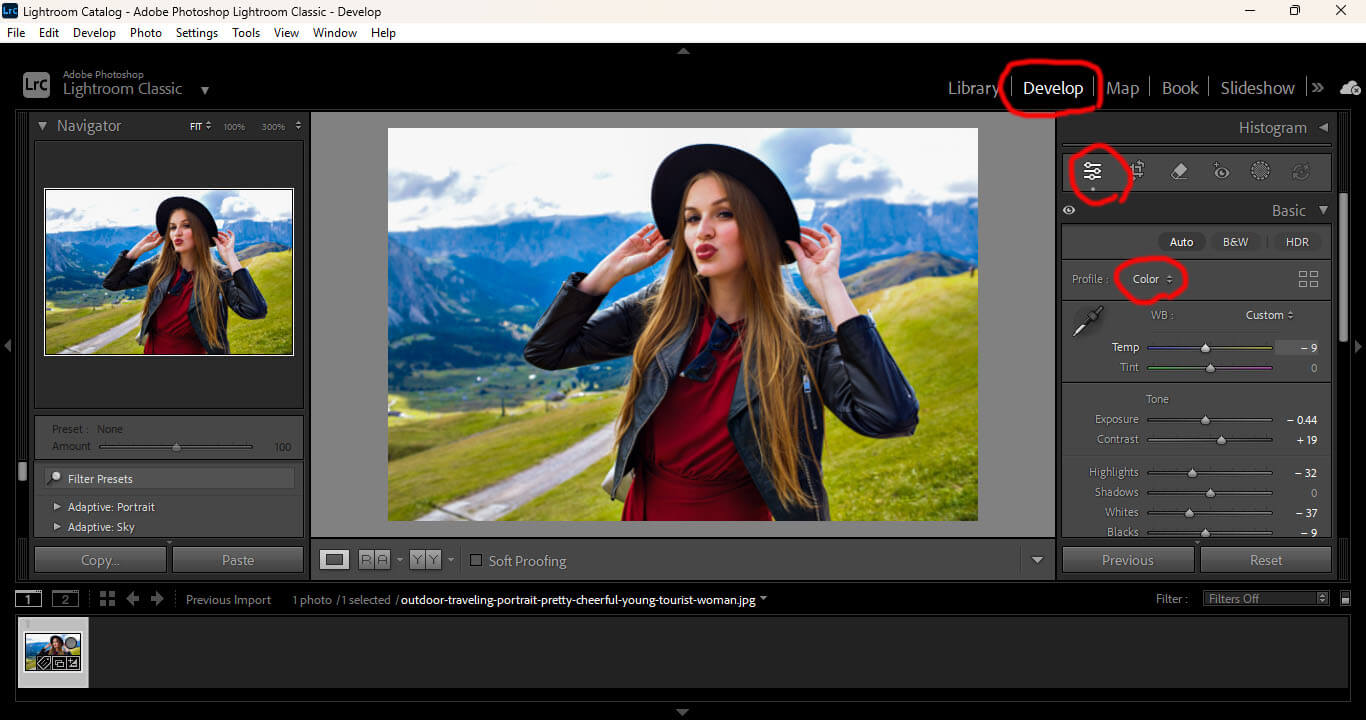
Step 2: Adjust the Basics First
Go to the Develop module — this is where the magic happens. Start with the Basic Panel, which includes the most important tools for exposure and tone control.
Here’s what each setting does:
* Exposure: Brightens or darkens your whole image.
* Contrast: Adds depth and separation between lights and darks.
* Highlights & Shadows: Helps you recover bright or dark details.
* Whites & Blacks: Fine-tunes the overall light range.
* Clarity: Boosts midtone contrast for sharper texture.
* Vibrance & Saturation: Enhances color intensity naturally.
Tip: Always start with exposure and tone before jumping into color or effects.

Step 3: Correct White Balance and Temperature
RAW photos sometimes appear too blue or too yellow. To fix this, use the White Balance tool (eyedropper) in Lightroom and click on something neutral (like a gray area). Then fine-tune the Temperature and Tint sliders until your colors look realistic and natural.
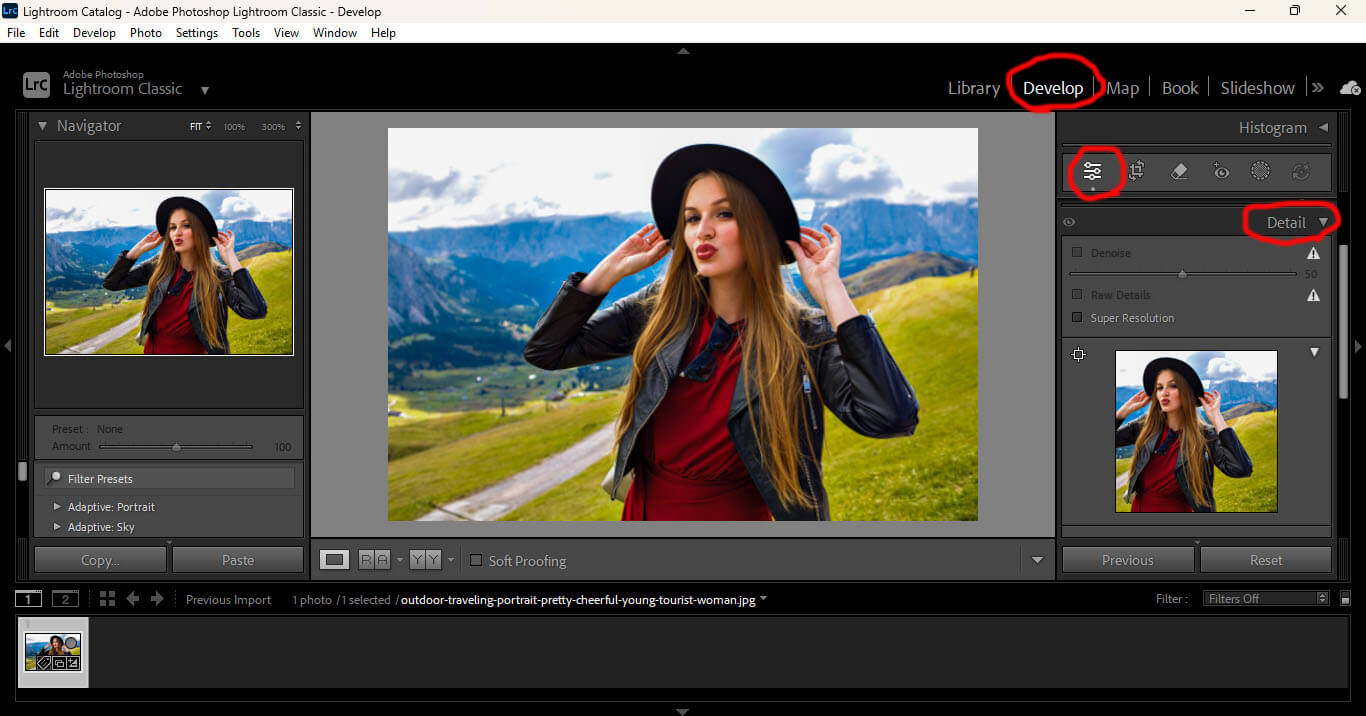
Step 4: Enhance Details and Reduce Noise
In the Detail Panel, you’ll find tools for sharpening and noise reduction.
Sharpening: Adds crispness and definition to edges (try around 50–70).
Noise Reduction: Smooths out grainy or low-light areas.
Keep it subtle — too much sharpening can make the image look artificial.
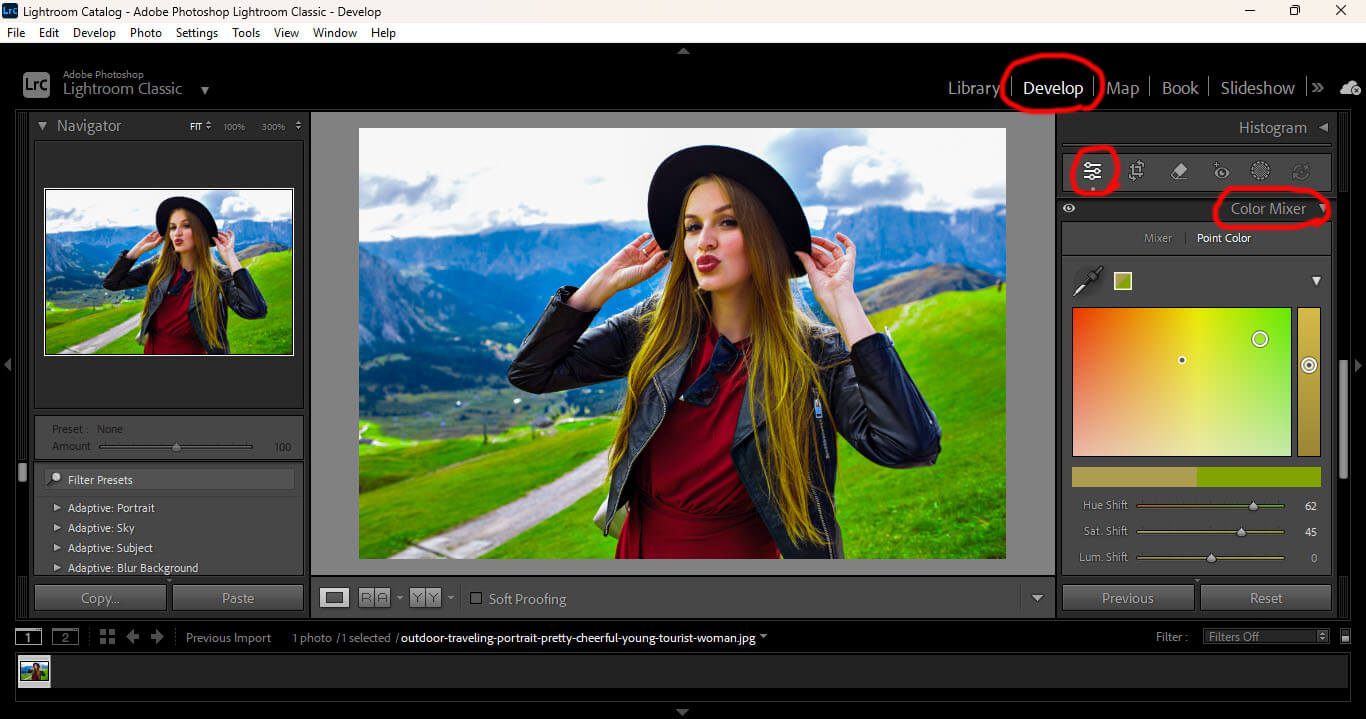
Step 5: Adjust Colors in the HSL Panel
The HSL/Color panel (Hue, Saturation, and Luminance) is where you refine specific colors.
For example:
* Increase blue saturation to make the sky pop.
* Lower orange saturation for smoother skin tones.
* Boost green luminance for a fresh outdoor look.
This panel gives you artistic control while keeping colors realistic.
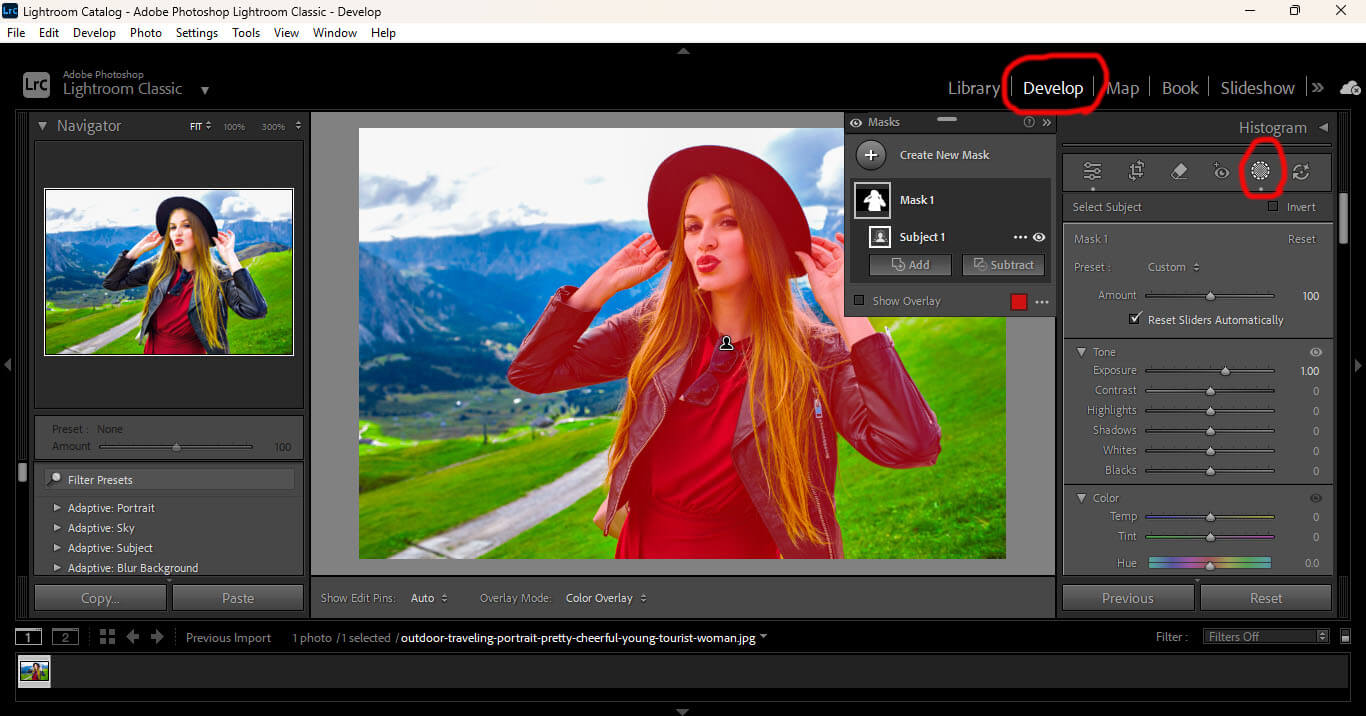
Step 6: Use Masking for Local Adjustments
Lightroom’s Masking tools (Brush, Linear Gradient, Radial Mask) let you edit specific parts of a photo without affecting the whole image.
Common uses:
* Brighten the subject’s face using a Radial Mask.
* Darken the sky or background with a Linear Gradient.
* Smooth out skin or add glow with a Brush Mask.
This selective control helps you highlight your subject and balance the scene.
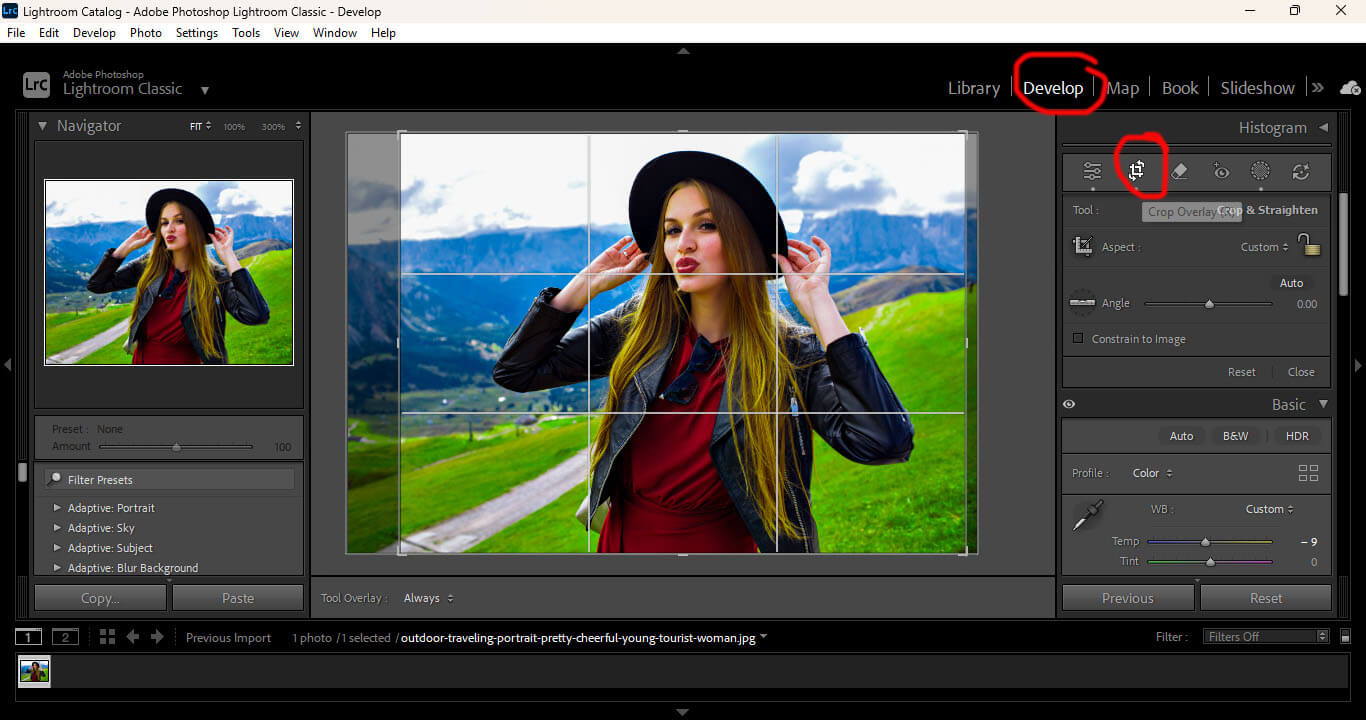
Step 7: Crop and Straighten
Use the Crop Tool (R) to fix uneven horizons and unwanted edges. Experiment with different aspect ratios:
* 4:5 – Best for Instagram
* 3:2 – Standard DSLR ratio
* 16:9 – Great for cinematic photos
Good composition makes your image stronger before you even start editing.
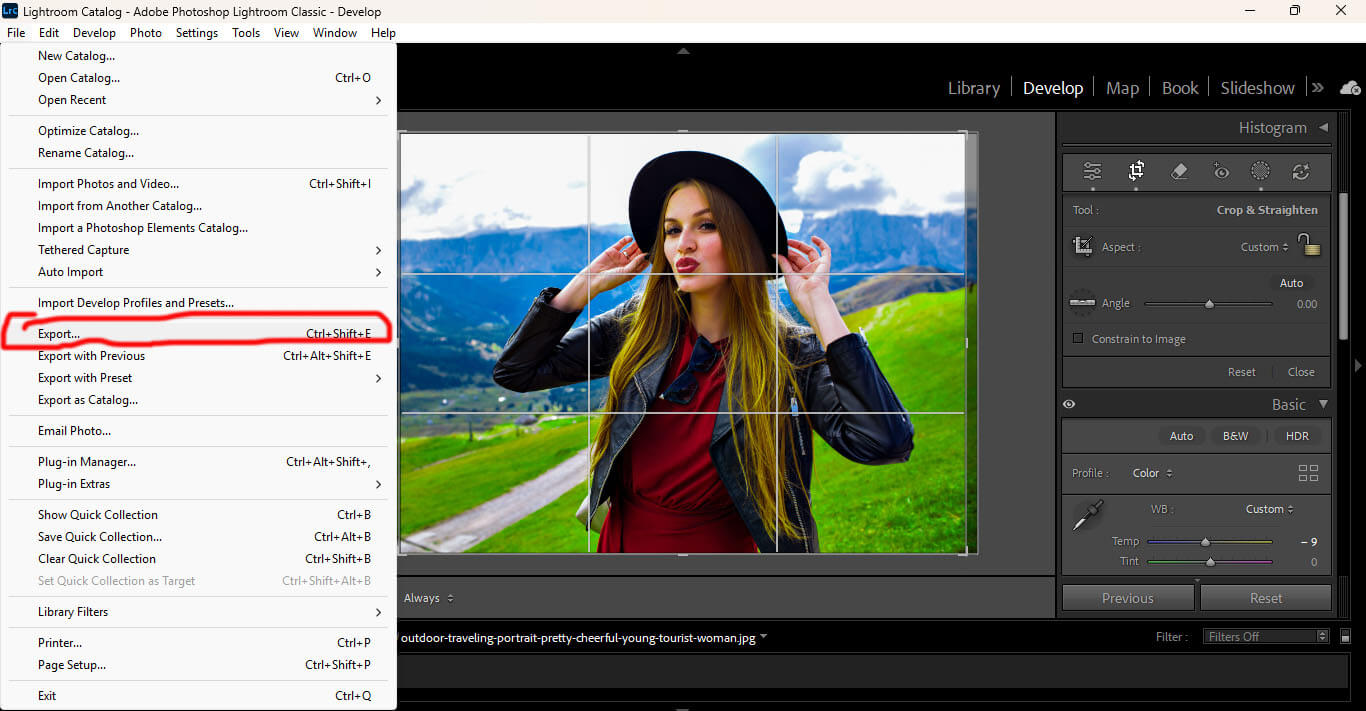
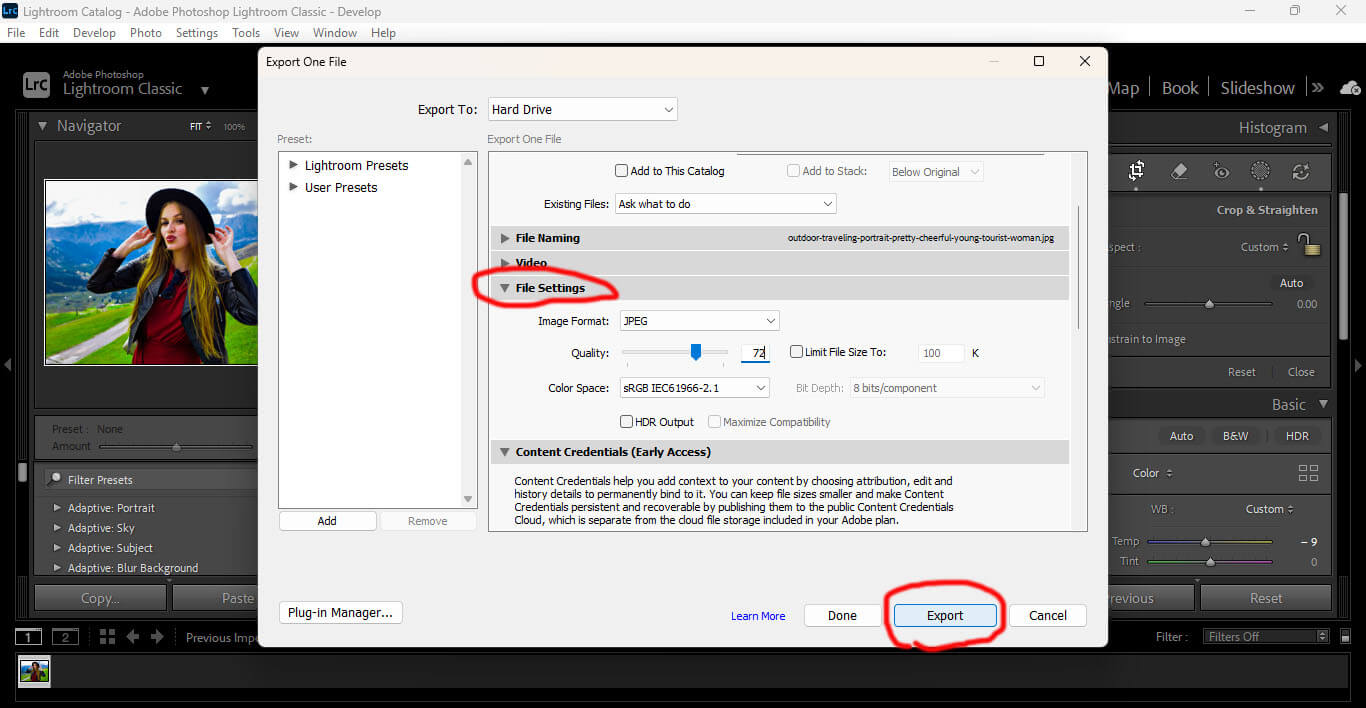
Step 8: Export Your Final Image
Once your edit looks perfect, it’s time to export your photo.
1. Click File → Export
2. Choose JPEG (for web) or TIFF (for print)
3. Set Quality: 80–100
4. Adjust Resolution: 72 ppi for online, 300 ppi for print
5. Click Export
Tip: Always save a high-quality version of your final image for your portfolio or clients.
Extra Lightroom Editing Tips
* Use presets to save your favorite looks and speed up editing.
* Avoid over-editing; keep tones and colors realistic.
* Use the Before/After () shortcut to compare progress.
* Calibrate your monitor for accurate color grading.
Final Thoughts
Editing RAW photos in Lightroom isn’t just about moving sliders — it’s about bringing your creative vision to life. Once you understand light, color, and detail, your edits will start looking cleaner, natural, and professional.
The more you practice, the faster and more confident you’ll become. So open Lightroom, start experimenting, and watch your photography skills reach the next level.
Powered by Froala Editor